
If you’re running a WordPress site and want to get serious about understanding your visitors, tracking their behavior, and making data-driven decisions, you’ve come to the right place. Today, we’re going to walk you through the process of setting up a Google Analytics account, a powerful tool that can transform the way you view your website’s performance.
Setting up Google Analytics might sound a bit intimidating at first, but fear not! It’s a lot simpler than it seems, and I’ll guide you through each step with ease. Whether you’re a seasoned blogger, a small business owner, or just someone with a passion project, having insights into how users interact with your site is incredibly valuable. Plus, it’s free! So, let’s make sure you’re all set to harness the power of analytics without breaking a sweat.
Table of Contents
How to Create Google Analytics Account
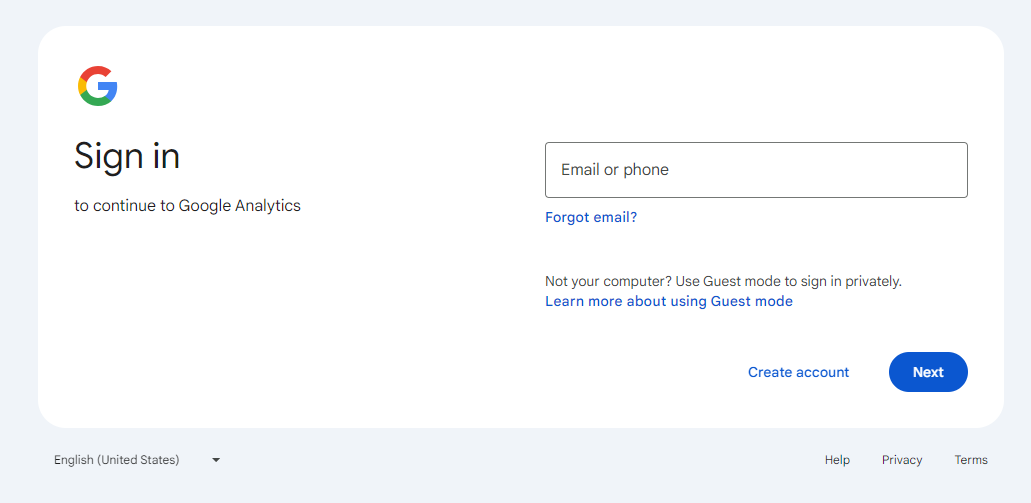
First, go to the Google Analytics URL here. There, you’ll be asked to sign in to your Google account or you can create a new one for your website’s Google Analytics.
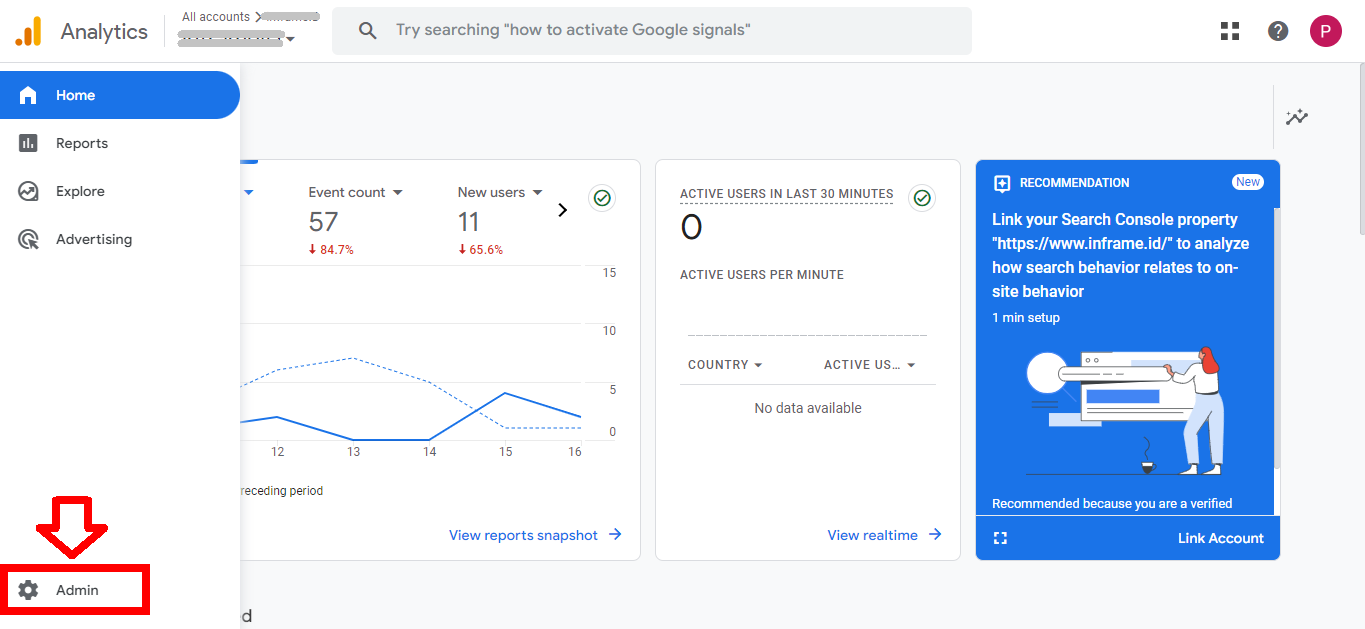
If you already have a Google Analytics account for another website with your Google account, you can still set up a new Google Analytics account for your WordPress blog using the same Google account. Just go to your Analytics dashboard, click on the “Admin” menu at the bottom, which you’ll find after moving your mouse cursor to the left side of your screen.
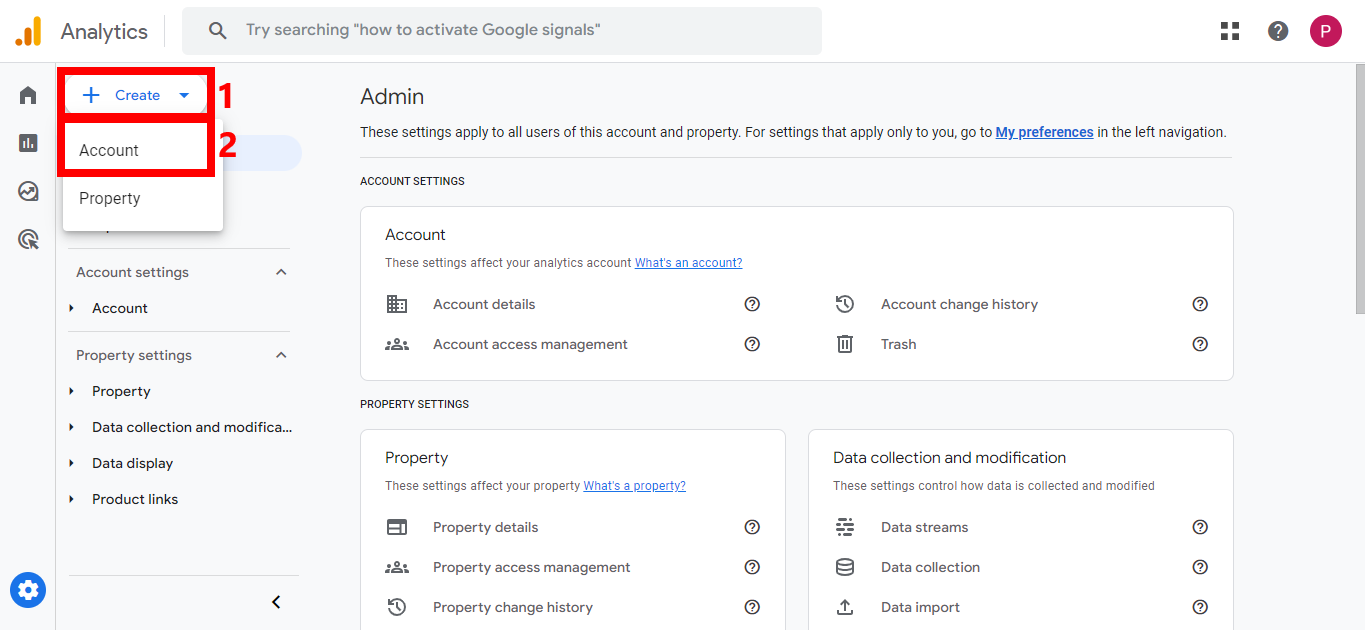
Then, click on the “Create” button and select the “Account” option.
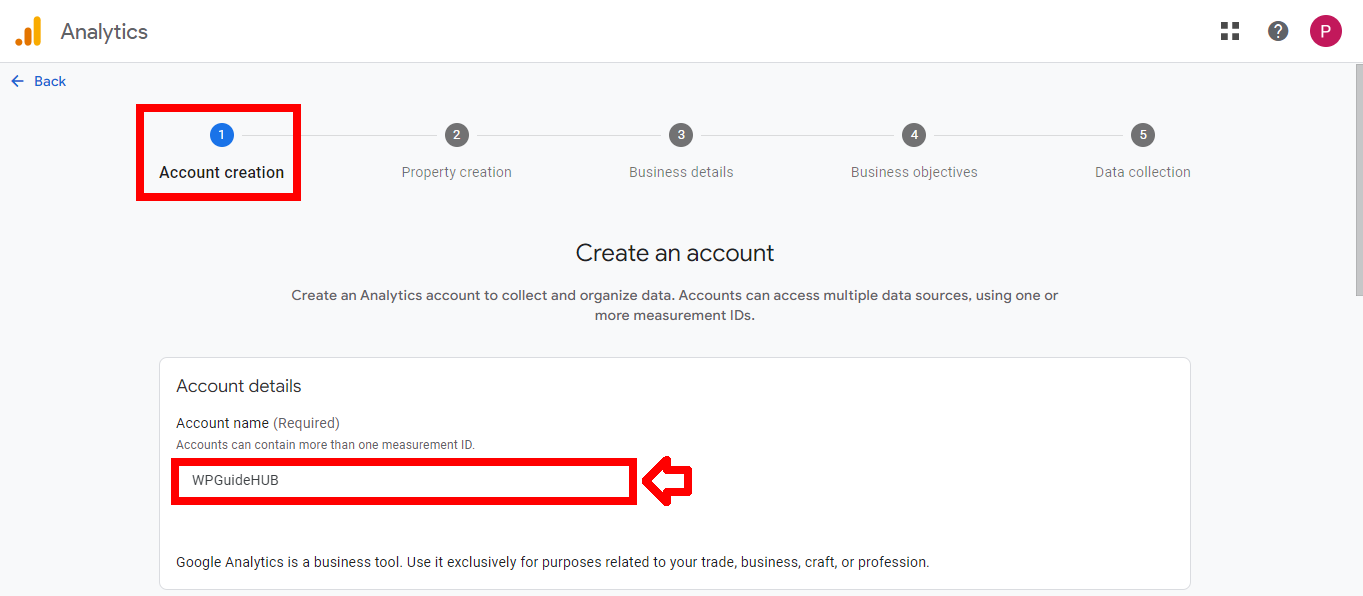
In the first section, Account Creation, fill in the “Account Name” field under “Account Details.” You can use your blog or website name for this. Below that, you’ll see “Account Data Sharing Settings.” You can choose according to your preferences or just leave the default settings. Then click the “Next” button to continue.
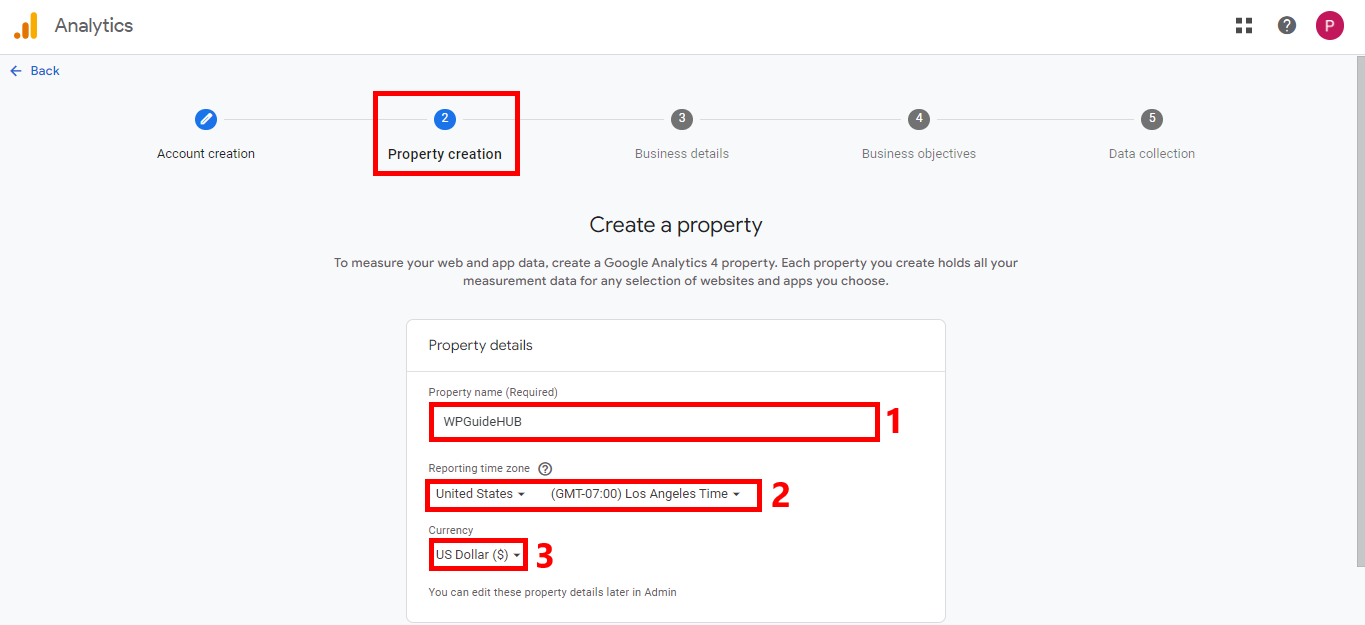
In the second section, “Property Creation,” fill in the “Property Name,” choose your local time zone under “Reporting Time Zone,” and select your country’s currency. Once you’re done, click the “Next” button.
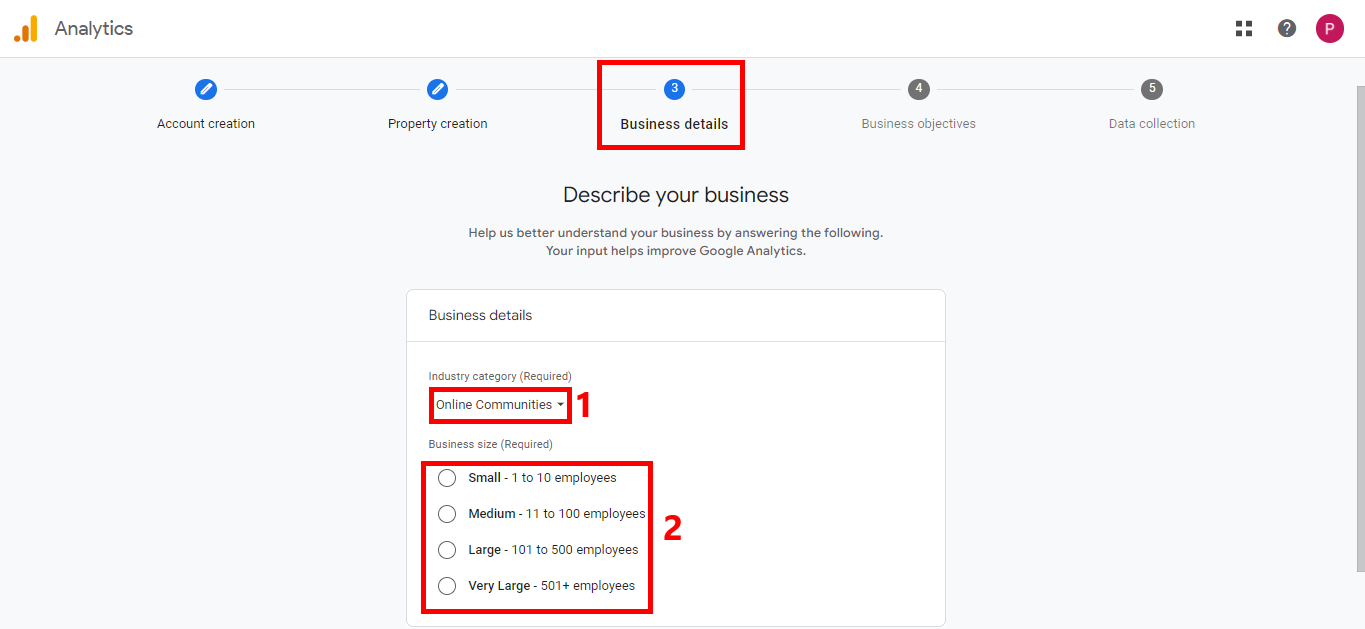
The third step is “Business Details.” Here, choose the “Industry Category” that best fits your website and select the appropriate “Business Size.” After that, click the “Next” button.
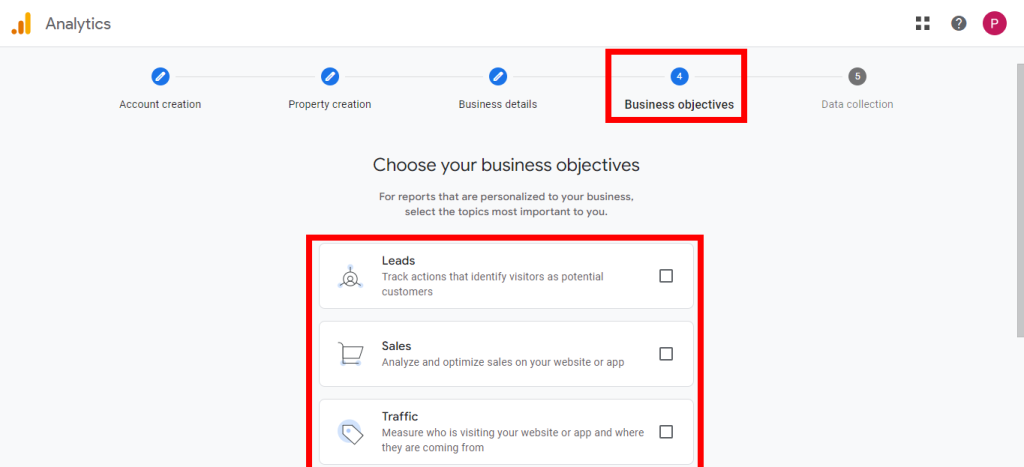
In the fourth section, “Business Objectives,” choose the options you want to measure with Google Analytics. You’ll find several choices, such as:
- Leads for tracking actions that identify visitors as potential customers.
- Sales for analyzing and optimizing sales on your website or app.
- Traffic for monitoring website traffic.
- User engagement & retention for learning how people interact with your products or services.
If none of these fit, select the last option: Other Multiple types of reports (note that this option can’t be combined with others). After that, click the “Next” button
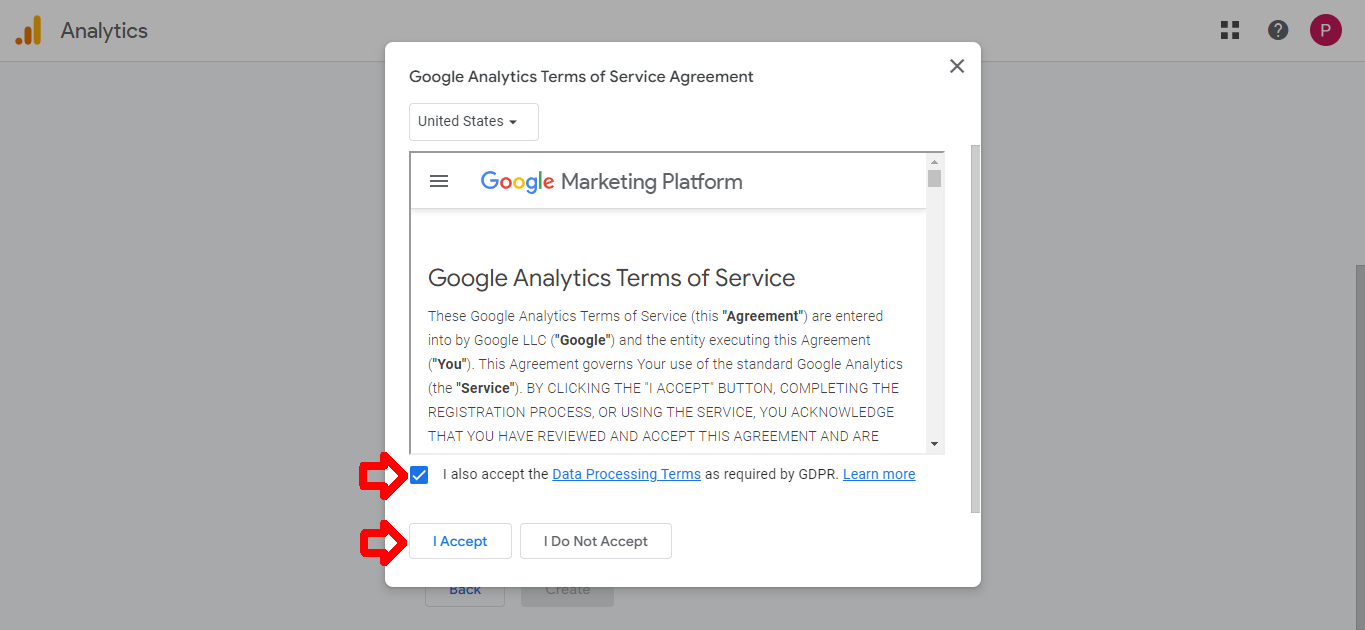
You’ll then see the Google Analytics Terms of Service Agreement box. Check the approval box and click the “I Accept” button.
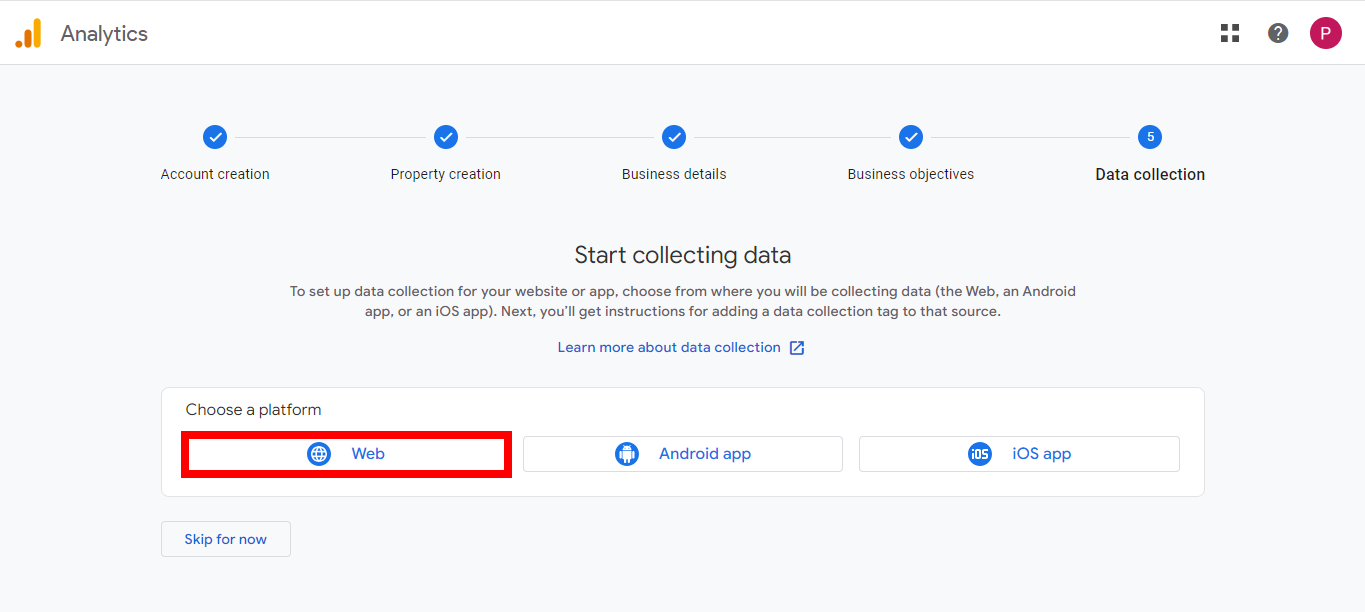
The next step is to choose your platform. You can select Web, Android App, or iOS App. Since this tutorial is for a website, click on the “Web” option.
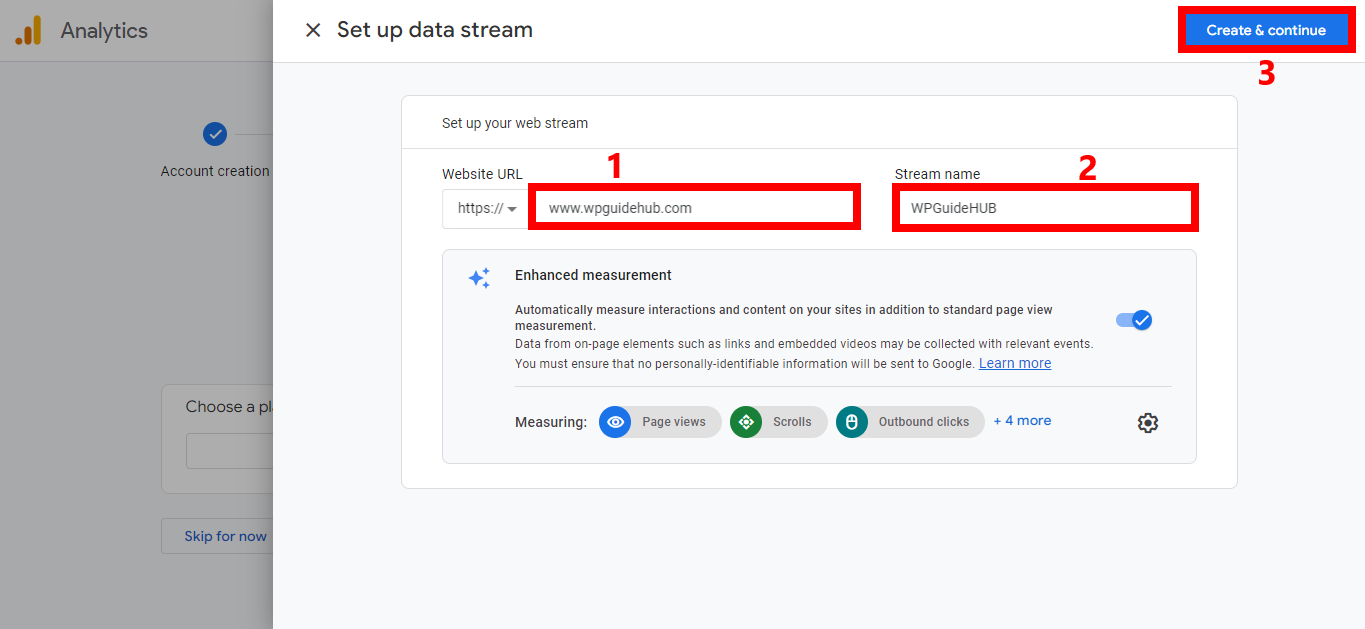
Next, enter your website URL and a stream name. For the stream name, you can use your website or blog’s name if you’re unsure what to put. Alternatively, you can enter the type of tracking you’re using, such as Sales, Leads, Traffic, or something else. Finally, click the “Create and Continue” button.
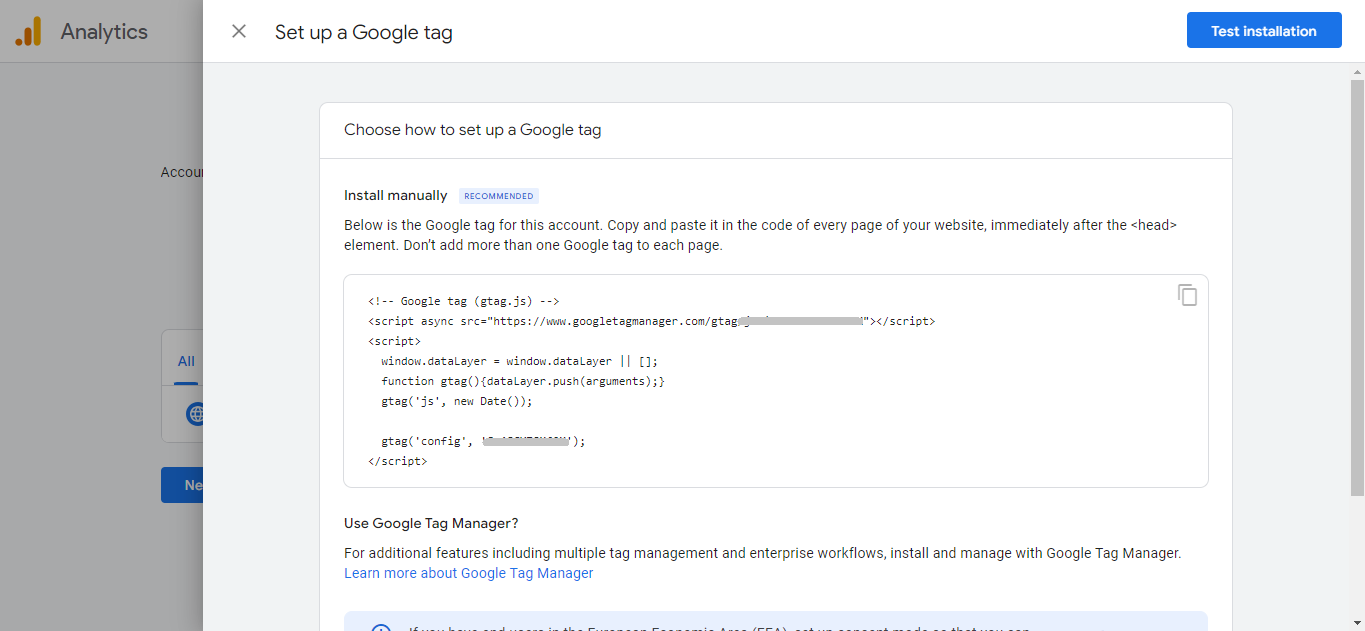
Finally, place the code that appears in each section of the header on your website before the </head> tag. If you’re not sure how to do this, you can use a plugin like Site Kit by Google to help you. With that plugin, you can connect your WordPress site to your Google Analytics account, and it will automatically place the code on your website for you.
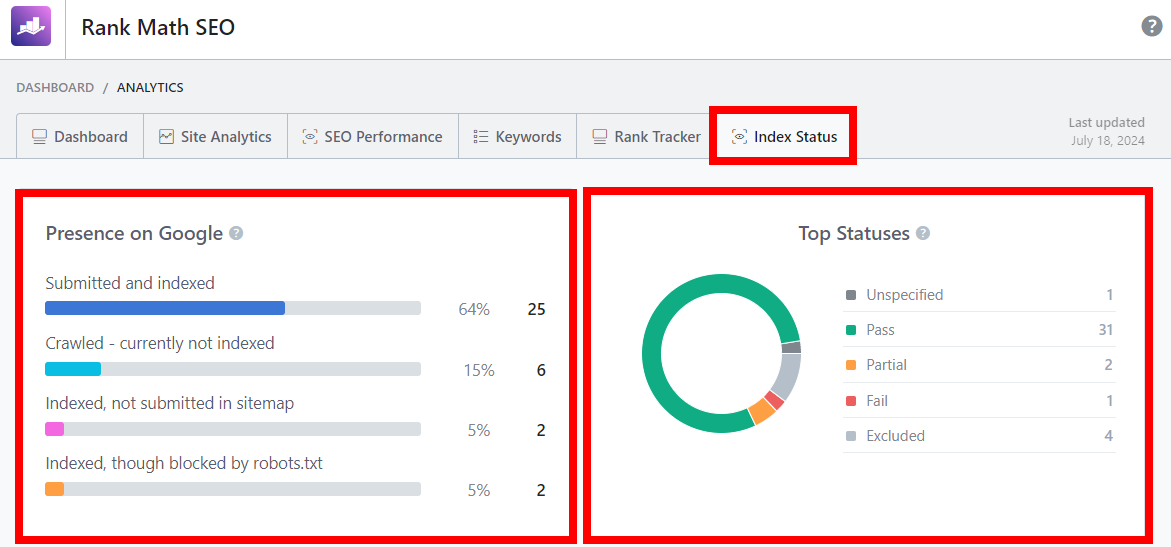
Alternatively, you can use the Rank Math SEO PRO plugin. One of its standout features is the integration with Google Analytics. This plugin not only automatically adds the Google Tag code to your site but also allows you to track your SEO performance directly from your WordPress dashboard. It also provides real-time insights into which content is indexed by Google and which isn’t.
Conclusion
That’s how you create a Google Analytics account for your website. If you have any questions, feel free to ask in the comments section. I’ll be happy to help!